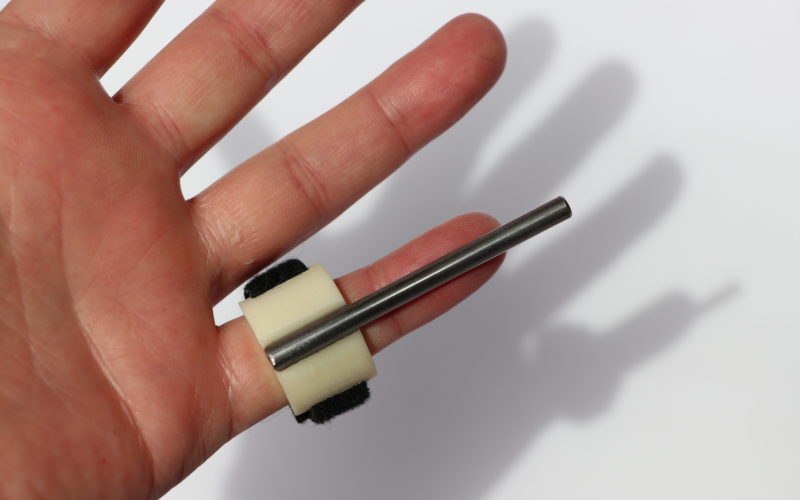
I like using a slide on my guitar, but most slides are bulky and uncomfortable. They feel sloppy to use and make my finger sweat. These 3D printed slides are comfortable and accurate. The design uses a 3D printed plastic piece that is comfortably strapped to your finger using Velcro. The slide uses a 3/16″ solid stainless steel bar for sliding on the strings. You can make the 2 1/2 inch bar slide, or the short 11/16″ bar.
*One word of caution, the sustain produced by this slide is not as good as some of its counterparts. This slide works best for electric guitar players using thin gauge strings and playing on the lower G, B and E strings.
Amazon Associates Affiliate Disclosure: Inventor Boy is a participant in the Amazon Services LLC Associates Program, an affiliate advertising program designed to provide a means for sites to earn advertising fees by advertising and linking to amazon.com.
Fun Facts!
The guitar was invented around the 15 century in Spain. Muy Impresionante!
What you will need:
Click on the pictures to purchase the items!
- ABS 3D Printer Filament of your choice.
2. 3/16″ stainless steel rods.
Tools that you will need:

You will need a ruler, a rotary cutoff tool, a Sharpie marker, a clamp, an emery board, safety glasses and a particulate respirator.
Here are the steps to make the Sly Slide!
Get the free .stl files and print! I used ABS filament with a print resolution of .15 mm with good results. I printed the part in a vertical position without support material.

If your print has any burrs or aberrations, remove them with an emery board, a file or sandpaper.

The bar comes with a distorted factory cut end. Remove about 3/8″ of one end with the rotary cutoff tool and deburr.

This bar has the distorted end removed.

With a marker, mark the length of the bar to whatever you choose. I use 2 1/2″ for my longer slide and 11/16″ for my shorter slide.

Using the rotary cutoff tool, cut the bars to the desired lengths.

Using the rotary tool, rough up an area about 5/8″ long for the epoxy to adhere to.

Mix the epoxy and fill the groove of the 3D printed part.

Clamp the bars in place and wipe away any excess epoxy. Follow the directions on the epoxy package for application and curing time. While you are waiting for the epoxy to cure, you can cut the Dorado cable ties to length. I have found that 4 1/2″ long works well for my pinky finger with a medium sized Sly Slide but you will have to see what works best for you.

Next slide the strap into the Sly Slide with the fuzzy part toward the slide (for finger comfort).


All that is left now is to position your finger in the slide and fold over the strap onto itself.
What more can be said at this point? “Party on Wayne.” “Party on Garth.”
Check out our latest blog posts!


